Labret Piercing: Complete Guide to Pain, Healing, Jewellery & Aftercare (2026)
Labret Piercing: Complete Guide to Pain, Healing, Jewellery & Aftercare (2026)
Whether you’re drawn to the understated cool of a standard lower lip stud, the edge of a side labret, or the symmetry of a Medusa, labret piercings are one of the most versatile and popular facial piercings around. They work on a huge range of face shapes, and with the right jewellery they can be as subtle or as bold as you like.
This guide covers everything you need to know before and after getting a labret piercing: what to expect from the pain, how long healing actually takes, what jewellery to wear, and how to look after it properly so it heals without complications.
What Is a Labret Piercing?
The term “labret” (pronounced LAY-bret) comes from the Latin word for lip. In piercing terms, it refers to a specific type of flat back stud jewellery as well as the piercing placements that use it. Traditionally, a labret piercing sits centred below the lower lip, but the word now covers a whole family of placements.
Here are the main types of labret piercing:
Standard (lower) labret: Centred below the lower lip, above the chin. Classic and versatile, and the most common starting point for anyone new to lip piercings.
Side labret: Off-centre below the lower lip, to the left or right. Works well as a standalone or paired with other lower lip piercings for a more layered look.
Vertical labret: Enters through the bottom of the lip and exits through the top, so both ends are visible on the lip itself. Uses a curved barbell rather than a flat back stud. Heals slightly differently from the others.
Medusa (philtrum): Centred above the upper lip, in the philtrum groove. Uses a flat back labret stud and sits right in the centre of the face, so placement accuracy matters a great deal.
Monroe and Madonna: Above the upper lip, offset to one side, mimicking a classic beauty spot. Monroe sits on the left, Madonna on the right. Both use a flat back labret stud.
Snake bites: Two side labrets placed symmetrically on either side of the lower lip, typically done in the same session or close together.
Angel bites: Two Monroe-style piercings, one on each side of the upper lip. The upper lip equivalent of snake bites.
All of these use the same basic jewellery type (the flat back labret stud) except the vertical labret, which uses a curved barbell. The aftercare principles are broadly the same across all placements, with the vertical labret requiring slightly more attention due to the lip tissue involvement.
How Much Does a Labret Piercing Hurt?
Pain is subjective, but labret piercings are generally considered a mid-range experience. Most clients describe the sensation as a sharp pinch when the needle passes through, followed by a brief moment of pressure. The whole procedure takes just a few seconds from start to finish.
What catches people off guard is not the piercing itself but what comes after. Swelling is almost guaranteed, particularly in the first 48 to 72 hours, and eating, talking and smiling can all feel a bit awkward until things settle down. Medusa piercings in particular tend to swell noticeably due to the density of the philtrum tissue.
| Piercing Type | Typical Pain Level (1–10) | Notes |
|---|---|---|
| Standard labret | 4 – 5 | Thin tissue below the lower lip; heals relatively smoothly |
| Side labret | 4 – 5 | Similar to standard; minor variation depending on exact position |
| Vertical labret | 5 – 6 | Passes through the lip itself; more visible swelling is common |
| Medusa (philtrum) | 5 – 7 | Denser philtrum tissue; piercing is slightly more intense |
| Monroe / Madonna | 4 – 6 | Thin upper lip tissue; swelling around the mouth can be pronounced |
| Snake bites (pair) | 4 – 6 per side | Done sequentially; combined swelling across both sides is notable |
How Long Does a Labret Piercing Take to Heal?
Healing a labret piercing takes real patience. The outer wound can look and feel healed within a few weeks, but the internal tissue takes considerably longer to fully mature. Rushing this process by changing jewellery too soon is one of the most common causes of complications, irritation bumps and prolonged healing.
| Stage | Timeframe | What to Expect |
|---|---|---|
| Inflammatory | Weeks 1 – 2 | Swelling, redness, tenderness, some clear or white discharge (lymph fluid). All normal. |
| Proliferative | Weeks 3 – 8 | Swelling reduces. New skin cells begin forming the piercing channel. Discharge decreases. |
| Downsize window | Weeks 4 – 8 | Return to your piercer for a shorter post. This step is important and should not be skipped. |
| Maturation | Months 3 – 12 | Piercing channel fully forms and toughens. Little or no discharge. Piercing feels settled. |
| Fully healed | 6 – 12 months | Safe to change jewellery independently. No soreness or discharge between cleans. |
Healing is not linear. Many people experience a temporary flare-up around the 3 to 4 month mark where things seem to irritate slightly after a period of calm. This is a recognised part of the maturation process and not necessarily a sign of infection. Continue with your aftercare routine and it usually settles within a week or two.
Labret Piercing Aftercare
Good aftercare is what separates a smooth healing journey from months of frustration. The good news is that once you get into a routine, it takes just a couple of minutes a day.
What to do
Clean the external piercing site twice a day using sterile saline solution (0.9% sodium chloride). Spray directly onto the piercing, leave for 30 to 60 seconds, then rinse gently. Avoid wiping with cotton wool, as fibres can catch on the jewellery. Rinsing in a warm shower works well as part of your morning or evening routine.
Rinse the inside of your mouth after every meal, drink or cigarette. The inside of the piercing needs as much attention as the outside. Plain water works for this, or you can use a diluted, alcohol-free mouthwash. Avoid full-strength mouthwash, as the alcohol content can dry out the healing tissue and cause irritation.
Keep your hands away from the piercing between cleans. Every time you touch it unnecessarily, you introduce bacteria from your hands into a fresh wound. If you do need to handle it, wash your hands thoroughly first.
Sleep on a clean pillowcase. If you tend to sleep face-down or on your side, the jewellery will press against the surface repeatedly through the night. A clean pillowcase reduces bacterial transfer, and a travel pillow with a hole in the centre can take pressure off the piercing entirely.
What to avoid
Avoid alcohol (both drinking and applying any alcohol-based product to the site), very spicy or acidic food in the early weeks, kissing and oral contact, makeup or skincare applied directly over the piercing, and submerging in pools, hot tubs, lakes or the sea until the piercing is fully healed.
Do not rotate or twist the jewellery. This is old advice that has been thoroughly discredited. Twisting tears the delicate healing tissue inside the channel and introduces bacteria from the outside of the jewellery into the wound. Leave it completely alone between cleans.
Avoid using harsh products such as Dettol, TCP, hydrogen peroxide or tea tree oil on a healing piercing. These are too aggressive for healing skin and delay rather than aid recovery. Sterile saline is genuinely all you need on the outside.
Labret Piercing Jewellery: What You Need to Know
The right jewellery makes a significant difference to how smoothly a labret piercing heals. There are two key decisions: the style and the material.
Jewellery styles for labret piercings
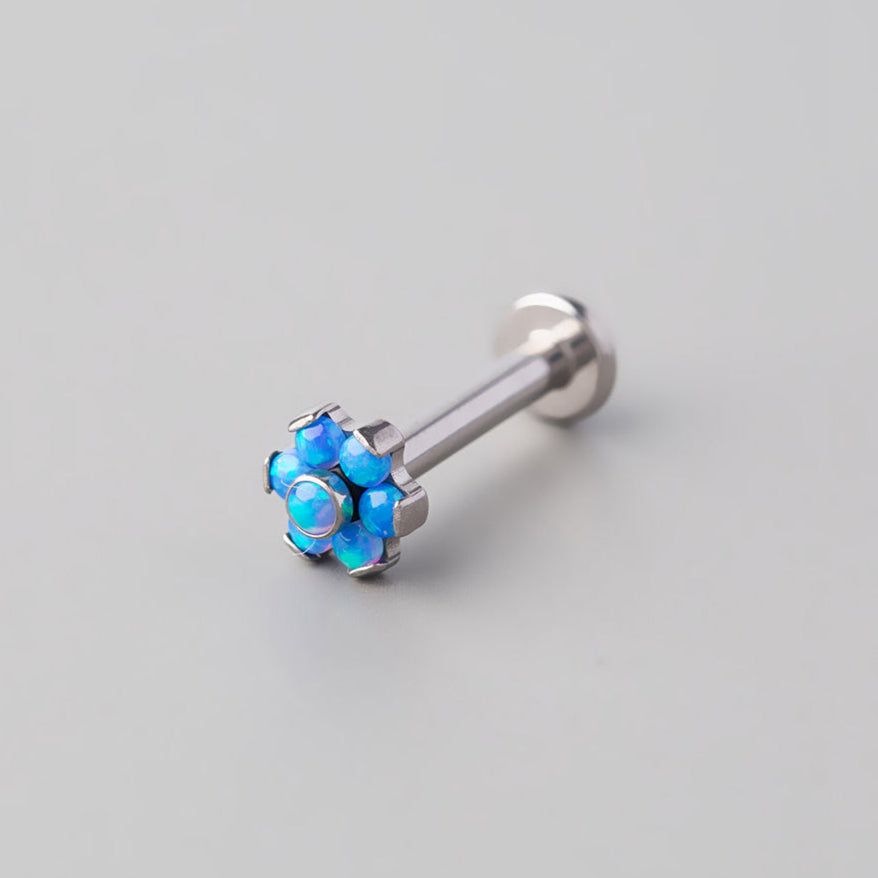
Flat back labret stud: The standard choice for new piercings and by far the most comfortable long-term option. A straight post with a smooth flat disc on one end (worn inside the mouth or against the gum line) and a decorative top on the other. Available in threadless (push-fit) and internally threaded versions. Threadless is increasingly preferred as there is no external thread to catch on healing tissue when inserting or removing tops.
Curved barbell: Used specifically for vertical labrets. The gentle curve follows the natural contour of the lip, keeping both decorative ends visible on the lip surface.
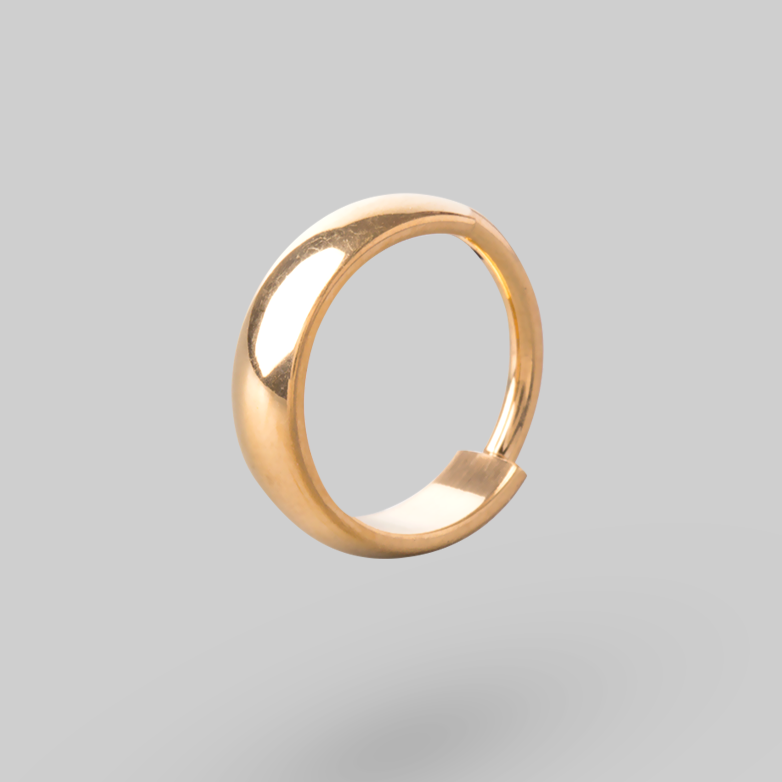
Hoops, rings and clickers: Suitable for healed labret piercings. Not recommended for fresh piercings as the constant movement disrupts the healing channel and significantly increases healing time.
Jewellery materials compared
| Material | Safe for New Piercings? | Key Benefits | Considerations |
|---|---|---|---|
| Implant grade titanium (ASTM F136) | Yes – recommended | Hypoallergenic, nickel-free, very lightweight, can be anodised into many colours | Best choice for anyone with sensitive skin or a new piercing |
| Implant grade steel (ASTM F138) | Yes | Durable, widely available, polishes to a high shine | Heavier than titanium; contains trace nickel (not problematic for most people) |
| Solid 14ct or 18ct gold | Yes (solid only, not plated) | Premium look, fully biocompatible, long-lasting | Gold plated or gold filled jewellery should be avoided as plating can flake inside healing tissue |
| Bioplast / PTFE | Yes (as a retainer) | Flexible, useful for sport, MRI scans or situations requiring low-profile jewellery | Not the best choice as primary healing jewellery; use titanium or steel initially |
| Acrylic or unknown metal | No | Inexpensive and widely available in fashion jewellery | Porous surface harbours bacteria; common cause of reactions and prolonged healing |
Jewellery Sizing for Labret Piercings
Getting the size right from the start matters more than most people realise. Here is what to expect at each stage.
Gauge (thickness): The vast majority of labret piercings are done at 1.2mm (16 gauge). Some piercers use 1.6mm (14 gauge) for lower lip placements where a slightly sturdier post is preferred. Your piercer will advise based on your anatomy and the specific placement.
Initial post length: Fresh piercings are fitted with a longer post, typically 8mm to 10mm, to give the swelling space to develop without the jewellery digging in. Once the swelling goes down, this longer bar will look a little loose and may move around slightly. That is completely normal and expected.
Downsized post length: At around 4 to 8 weeks, once the initial swelling has resolved, you should visit your piercer to swap the long initial bar for a shorter one, typically 6mm or 7mm. This step is genuinely important. A bar that is too long sits away from the skin, catches on things, and is much more prone to being knocked or pulled. A properly fitted shorter bar sits flush against the skin and heals far more cleanly.
Flat back disc size: The flat disc worn inside the mouth or against the gum is usually 5mm or 6mm in diameter. Your piercer will select the right size based on where the disc will sit. A disc that is too small can embed; one that is too large is uncomfortable against the teeth and gum.
Is That Normal? Healing Signs vs Warning Signs
Not every unexpected symptom means something has gone wrong. Learning to distinguish normal healing from something that needs attention will save you a lot of unnecessary worry.
Completely normal during healing: Some swelling, particularly in the first 2 weeks. Redness around the entry and exit points. Clear, off-white or slightly yellow crust forming around the jewellery (this is dried lymph fluid, not pus). Occasional tenderness when the area is touched. Mild itching as new skin forms. A small, smooth bump near the jewellery that shifts when you move the jewellery slightly (an irritation bump, usually resolves with better aftercare).
Get advice from your piercer if you notice: Green or dark yellow thick discharge with a strong smell. Spreading redness or warmth that extends well beyond the piercing site. Pain that increases rather than decreases after the first 2 weeks. A fever or feeling generally unwell. The jewellery appearing to sink into or become embedded in the skin. A firm lump that does not move, does not change over weeks, and feels different from the surrounding tissue (this may indicate a developing keloid rather than a simple irritation bump).
If you are unsure, your piercer is always the best first port of call before you turn to the internet. They can assess the piercing in person and give you accurate, placement-specific advice. If you think you may have an infection, do not remove the jewellery without professional guidance. Removing jewellery while an infection is active can cause the wound to close over the infection, trapping bacteria inside the tissue.
Key Takeaways
- Labret piercings cover a family of placements around the lip area: standard, side, vertical, Medusa, Monroe, Madison, snake bites and more. All use flat back labret studs except the vertical labret, which uses a curved barbell.
- Pain is typically rated 4–6 out of 10. The needle pass is fast; swelling and tenderness in the days after is usually the most uncomfortable part.
- Full healing takes 6–12 months. The outside looks healed long before the internal tissue is ready. Do not change jewellery early.
- A downsize at 4–8 weeks is essential, not optional. A properly fitted shorter bar dramatically reduces the chance of irritation and snags.
- Implant grade titanium is the best material for new piercings: nickel-free, lightweight, hypoallergenic and available in a wide range of anodised colours.
- Clean twice daily with sterile saline, rinse your mouth after eating and drinking, and leave the jewellery completely alone between cleans. That is genuinely all you need to do.
- Hoops and rings are for healed piercings only. Start with a flat back labret stud and switch to hoops once you are fully healed.
Shop Labret Piercing Jewellery at Camden Body Jewellery
We stock a wide range of flat back labret studs, threadless push-fit tops, and curved barbells in implant grade titanium and surgical steel. All our jewellery is sterilised before dispatch, making it ready for new piercings straight from the packet.
Browse our labret piercing jewellery collection for a full range of initial and healed options, from simple gem tops to more elaborate decorative styles. If you’re looking specifically for flat back threadless pieces that work as interchangeable tops, explore our flat back earrings range for a wide variety of styles that fit standard 1.2mm labret posts.
Check our website for current pricing and delivery options. We dispatch to the UK and internationally, and our team is happy to help with any questions about sizing or jewellery compatibility.
Frequently Asked Questions
How long does a labret piercing take to heal?
A standard labret piercing typically takes 6 to 12 months to fully heal. The first 2 weeks are the most reactive, with swelling and some discharge. After 6 to 8 weeks most people feel comfortable day to day, but the internal tissue continues to mature for several months after that. Medusa piercings and vertical labrets often sit at the longer end of this range.
How painful is a labret piercing?
Most people rate the pain at around 4 to 5 out of 10. The needle pass itself is fast and over in a couple of seconds. Swelling and tenderness in the days following tends to be the most uncomfortable part, especially if you eat a lot of spicy food or forget to rinse after meals early in healing.
What size jewellery is used for a labret piercing?
Initial piercings are usually done with a 1.2mm (16 gauge) flat back labret stud, around 8mm to 10mm long to accommodate swelling. Once the initial swelling has settled, typically at 4 to 8 weeks, your piercer will downsize you to a 6mm or 7mm post. The flat back disc is usually 5mm to 6mm in diameter.
Can I use a hoop for a new labret piercing?
It is strongly recommended to start with a flat back stud rather than a ring. Rings move around considerably more than flat back studs and can pull on the healing channel, causing irritation bumps and extending healing time. Once the piercing is fully healed, you can switch to a hoop, ring or clicker with no issues.
What is the best material for a labret piercing?
Implant grade titanium (ASTM F136) is the top recommendation for new piercings. It is nickel-free, extremely lightweight and can be anodised into a wide range of colours, making it both practical and versatile. Implant grade surgical steel and solid 14ct or 18ct gold are also safe choices. Avoid acrylic, mystery metal or plated jewellery in a healing piercing.
How do I clean a labret piercing?
Clean twice daily using sterile saline spray (0.9% sodium chloride). Spray onto the external piercing site, leave for 30 to 60 seconds, then rinse with warm water. Rinse the inside of the piercing after every meal, drink or smoke, using plain water or a diluted alcohol-free mouthwash. Do not twist or rotate the jewellery, and do not use harsh antiseptics like TCP or hydrogen peroxide.
When can I change my labret jewellery?
Wait until the piercing is fully healed before changing jewellery yourself, which is typically at least 6 months for a standard labret and up to 12 months for a Medusa or vertical labret. Your first jewellery change is ideally done with your piercer’s help, as they can confirm healing progress and show you the correct technique for your specific jewellery style.
Will a labret piercing leave a scar?
Most healed labret piercings leave a small indent or mark if the jewellery is removed permanently. This is a natural consequence of a healed fistula (piercing channel) closing. With good aftercare and appropriate jewellery throughout healing, any resulting mark is typically minimal. Removing jewellery before the piercing is healed significantly increases the chance of a more noticeable scar forming.
Can I eat and drink normally with a new labret piercing?
Yes, with a few sensible adjustments in the early weeks. Stick to softer foods for the first week, avoid very spicy, very acidic or very crunchy foods while swelling is present, and rinse your mouth after every meal and drink. Avoid straws in the early days, as the suction motion can disturb the jewellery and irritate the healing site. Talking and smiling may feel awkward for the first couple of days due to swelling but this passes quickly for most people.
Is a labret piercing the same as a Monroe or Medusa piercing?
Not quite. All three use the same style of jewellery (a flat back labret stud) but sit in different positions on the face. A standard labret sits below the centre or side of the lower lip. A Monroe is offset above the upper lip (traditionally on the left side, mimicking Marilyn Monroe’s beauty spot). A Medusa is centred above the upper lip in the philtrum groove. Each has its own healing characteristics but shares the same fundamental aftercare approach.
Read Next
Stop The Reaction Before It Starts
90% of piercing irritation comes from poor quality metal. Upgrade to ASTM F-136 Implant Grade Titanium-the biocompatible gold standard used by professional piercers worldwide.
Myths vs. Reality
Myth: "Itchiness means infection."
False. Infection usually involves throbbing pain, heat, extreme swelling, and yellow/green pus. Mild itching alone is rarely an infection.
Myth: "Turn the jewelry to scratch the itch."
Never twist! Twisting breaks the healing seal, introduces bacteria inside the wound, and extends healing time by weeks.
Why Shop Camden?
-

Implant Grade Titanium
ASTM F-136 Compliant
-

Tracked UK Delivery
Free over £40
-

Sterilised Piercing Jewellery
Keeping your skin safe